Hiển thị các bài đăng có nhãn CSS Blog. Hiển thị tất cả bài đăng

Tạo Widget Giống Twitter Cho Blog.

  7 nhận xét
tháng 3 11, 2018


Hôm nay TTPC4x Share cho bạn Widget Twitter được TTPC4x Edit lại của Ingrid Rauany


Tạo Widget Giống Twitter Cho Blog.

Hướng Dẫn:

Đầu Tiên Các Bạn Thêm CSS Cho Nó Bằng Cách.
Tìm Thẻ b:skin 
Sau đó dán đoạn code dưới đây vào dưới thẻ b:skin

.twitter-pc4x {
    display: flex;
    flex-direction: column;
    width: 446px;
    background-color: transparent;
    box-shadow: 1px 1px 16px rgba(0,0,0,.58);
    border-radius: 3px;
    overflow: hidden;
}

header {
  background: url(http://cameronbaney.com/codepen/twitter-pc4x/bg-header.jpg) no-repeat;
  color: #fff;
  display: flex;
  aling-items: center;
}

header .picture {
  padding: 15px;
  display: flex;
}

header .picture img {
  border: 4px solid #00CD66;
  border-radius: 3px;
}

header .profile {
  display: flex;
  flex-direction: column;
  justify-content: center;
}

header .profile .user {
  font-size: 22px;
  font-weight: 600;
  margin: 0px 5px;
}

header .profile .description {
  font-size: 13px;
  font-weigh: 400;
  margin: 5px 8px;
}

section.stats {
  display: flex;
  background: rgb(243,243,243);
}

section.stats div {
  flex: 1;
  border-bottom: 1px solid #d4d4d4;
  padding: 10px;
}

section.stats div a {
  display: flex;
  flex-direction: column;
  align-items: center;
  justify-content: center;
  text-decoration: none;
  color: #696969;
}

section.stats div a:hover {
  color: #9C9C9C;
}

section.stats strong {
  font-size: 20px;
}

nav.menu {
  display: flex;
  background: rgb(243,243,243);
}

nav.menu a {
  flex: 1;
  color: #696969;
  display: flex;
  justify-content: center;
  align-items: center;
  padding: 15px;
  text-decoration: none;
}

nav.menu a:hover {
  color: #9C9C9C;
}


Tiếp theo các bạn cần chèn đoạn code này vào nơi  bạn muốn Widget xuất hiện, có thể vào bố cục- thêm tiện ích :  HTML/Javascript cũng được.

<div class="twitter-pc4x">
    <header>
      <div class="picture">
        <img src="http://cameronbaney.com/codepen/twitter-pc4x/avatar.jpg" alt="TTPC4x">
      </div>
      <div class="profile">
        <p class="user">4xTeam</p>
        <p class="description">Thủ Thuật PC4x
        </p>
      </div>
    </header>

    <section class="stats">
      <div class="tweets">
        <a href="#">
          <strong>266</strong>tweets
        </a>
      </div>
      <div class="following">
        <a href="#">
          <strong>60</strong> following
        </a>
      </div>
      <div class="followers">
        <a href="#">
          <strong>117</strong> followers
        </a>
      </div>
    </section>

    <nav class="menu">
      <a href="#"><i class="fa fa-pencil-square-o fa-2x" aria-hidden="true"></i></a>
      <a href="http://www.thuthuatpc4x.tk/#HTML6"><i class="fa fa-comment-o fa-2x" aria-hidden="true"></i></a>
      <a href="#"><i class="fa fa-user fa-2x" aria-hidden="true"></i></a>
      <a href="#"><i class="fa fa-cog fa-2x" aria-hidden="true"></i></a>
    </nav>
  </div>


Cuối cùng là Font, các bạn thêm đoạn này vào trong thẻ <Head>.

  <link href="//netdna.bootstrapcdn.com/font-awesome/4.1.0/css/font-awesome.min.css" rel="stylesheet">

 Như vậy là xong.

Xem DEMO Live Tại Button Dưới Đây.


Xem Thêm Code Tại Đây.

XEM CHI TIẾT

Share 8 Button On/Off Cực Đẹp.

  2 nhận xét
tháng 3 09, 2018

Share 8 Button On/Off Cực Đẹp.

Share 8 Button On/Off Cực Đẹp.


Hôm nay Thủ Thuật PC4x Share Bộ Button On/Off Cực Đẹp Cho AE Blogger hoặc AE nào Làm Web.


Hướng Dẫn :

Bạn Chỉ Cần Thêm Đoạn CSS vào Dưới Thẻ B:skin.

Còn HTML Thêm vào nơi cần để Button.

+Lưu ý: Nếu bạn muốn thêm vào 1 Page hoặc 1 bài viết để làm demo thì khuyên dùng add đoạn css vào giữa 2 thẻ <style> </style> trong bài/trang đó để chống giật cho Template.


Code được share trên CodePen.

AE lấy nhớ để nguồn của Ashley Nolan

Nguồn Bài Viết : Thủ Thuật PC4x

XEM CHI TIẾT

Code Button Chuyển Động Bằng Mouse Cho Blog.

  8 nhận xét
tháng 3 09, 2018

Code Button Chuyển Động Bằng Mouse Cho Blog.


Dán Đoạn CSS Này Dươí Thẻ B:Skin.


.btn {
  position: relative;
  background-image: linear-gradient(135deg, #667eea 0%, #764ba2 100%);
  padding: 14px 50px;
  border-radius: 4px;
  border: none;
  color: #fff;
  cursor: pointer;
  outline: none;
  overflow: hidden;
  box-shadow: 0 14px 30px rgba(0,0,0,0.15);
  font-family: 'Lato', sans-serif;
  font-size: 16px;
  text-transform: uppercase;
  letter-spacing: 2px;
  
  span {
    position: relative;
  }
    
  &::before {
    --size: 0;
    content: '';
    position: absolute;
    left: var(--x);
    top: var(--y);
    width: var(--size);
    height: var(--size);
    background: radial-gradient(circle closest-side, #a3b1f1, transparent);
    transform: translate(-50%, -50%);
    transition: all .2s ease, left 0s, top 0s;
  }
  
  &:hover::before {
    --size: 200px;
  }
}

Dán Đoạn Này Trên Thẻ Đóng  </body


<script type='text/javascript'>
const btn = document.querySelector('.btn')

btn.onmousemove = function (e) {
  const x = e.pageX - btn.offsetLeft
  const y = e.pageY - btn.offsetTop
  
  btn.style.setProperty('--x', x + 'px')
  btn.style.setProperty('--y', y + 'px')
}
</script>


Cuối cùng là đoạn code hiển thị Button, chèn vào vị trí cần đặt.


<button class="btn">
  <span>Button</span>
</button>


Code Được Lấy Từ  CodePen.  PC4x Edit + Share Về Blog.

XEM CHI TIẾT

Hiệu ứng hình ảnh khi rê chuột vào cho blog.

  Không có nhận xét nào
tháng 8 30, 2017

Hôm nay mình sẽ hướng dẫn các bạn cách thêm hiệu ứng khi rê chuột vào ảnh.


Code này rất đơn giản các bạn chỉ cần tìm : /b:skin

Sau Đó Dán Đoạn code này vào trên code /b:skin.

img:hover {    -webkit-filter: grayscale(1);}

Lưu Lại.

Chúc các bạn thành công!

XEM CHI TIẾT

Thống kê lượt xem-bài viết-bình luận cho Blog Của Bạn.

  Không có nhận xét nào
tháng 8 30, 2017

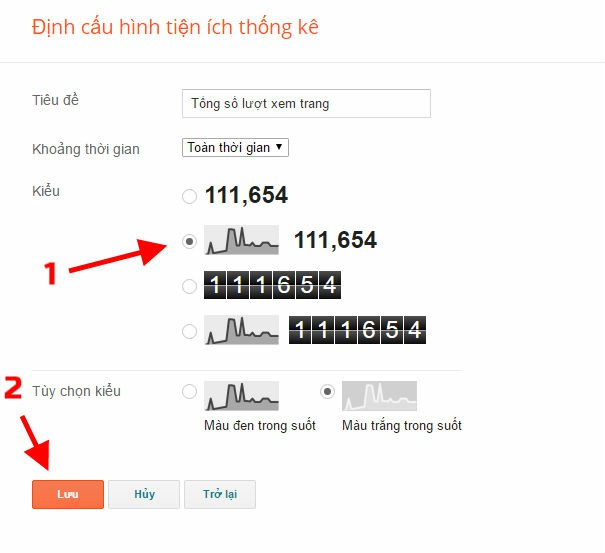
Hôm Nay Mình Sẽ Hướng Dẫn Các Bạn Cách Hiển Thị Thống Kệ Lượt Xem-Bài Viết-Bình Luận Cho Blog Của Bạn.


Bước 1: Các bạn vào Trang Tổng Quan > Bố Cục > Thêm Tiện Ích và chọn tiện ích Thống Kê Blog


  Bước 2: Vào phần Chủ Đề > Chỉnh sửa HTML > Chuyển đến tiện ích "Stats1" và tìm Đoạn Code sau:
<b:widget id='Stats1' locked='false' title='Custom Stats' type='Stats' version='1' visible='true'>...</b:widget>
  Hãy thay nó bằng đoạn code sau:
<b:widget id='Stats1' locked='false' title='Custom Stats' type='Stats' version='1' visible='true'>    <b:includable id='main'>  <b:if cond='data:title'><h2><data:title/></h2></b:if>  <div class='widget-content'>    <!-- Content is going to be visible when data will be fetched from server. -->    <div expr:id='data:widget.instanceId + &quot;_content&quot;' style='display: none;'>      <!-- Counter and image will be injected later via AJAX call. -->      <b:if cond='data:showSparkline'>        <img alt='Sparkline' expr:id='data:widget.instanceId + &quot;_sparkline&quot;' height='30' src='http://2.bp.blogspot.com/-nsxCtkYnchQ/VLEifAyf97I/AAAAAAAAIlk/9Viyy0W9r04/s1600/FFF.png' title='Sparkline' width='75'/>      </b:if>      <b:if cond='data:showGraphicalCounter'>        <span class='counter-wrapper graph-counter-wrapper' expr:id='data:widget.instanceId + &quot;_totalCount&quot;'/>      <b:else/>        <span class='counter-wrapper text-counter-wrapper' expr:id='data:widget.instanceId + &quot;_totalCount&quot;'/>      </b:if><script type='text/javascript'>function postCount(json){document.write(&quot;<span class='counts post2'> Total Posts &quot;);var count = json.feed.openSearch$totalResults.$t;document.write(&quot;<span class='count'>&quot; + count + &quot;</span>&quot;);document.write(&quot;</span>&quot;)}
function numberOfComments(json){document.write(&quot;<span class='counts comment'> Total Comments &quot;);var count = json.feed.openSearch$totalResults.$t;document.write(&quot;<span class='count'>&quot; + count + &quot;</span>&quot;);document.write(&quot;</span>&quot;)}
</script><script src='/feeds/posts/default?alt=json-in-script&amp;amp;max-results=0&amp;amp;callback=postCount' type='text/javascript'/><script src='/feeds/comments/default?alt=json-in-script&amp;amp;max-results=0&amp;amp;callback=numberOfComments'/>

    </div>  </div></b:includable>  </b:widget>
 Bước 3: Chúng ta đã hoàn thành được 80% rồi giờ ta thêm CSS vào để nó đẹp lên nào. Tìm đến thẻ </Head> và thêm đoan code sau phía trên nó:
<link href='//fonts.googleapis.com/css?family=PT+Sans:400,700' rel='stylesheet' type='text/css'/><link href='//maxcdn.bootstrapcdn.com/font-awesome/4.5.0/css/font-awesome.min.css' rel='stylesheet'/> <style type='text/css'>/* Blogger Custom Stats widget by huyhoangit.com */.Stats img {display:none!important;background-image:none;}.Stats .counter-wrapper {width:92%;text-align:right;margin:10px;line-height:35px;color:#333;font-weight:700;font-size:16px;margin-left: 0;}.Stats .counter-wrapper:after {content:&quot;Page Views&quot;;float:left;text-align:left;font-size:13px;font-weight:700;color:#333;}.counts {display:inline-block;width:92%;font-size:13px;line-height:35px;color:#333;font-weight:700;}.counts .count {display:inline-block;font-size:16px;height:30px;vertical-align:top;direction:ltr;float:right;color:#333;font-weight:700!important;}.counts:hover .titles:before {color:#333!important;border-radius:2px;border-color:rgba(255,255,255,0.1);}.counter-wrapper.text-counter-wrapper:before, .counts:before {display:inline-block;font-size:13px;font-family:FontAwesome;font-style:normal;font-weight:normal;margin:0 10px 0 10px;float:left;width:10px;text-align:center;}.counter-wrapper.text-counter-wrapper:before, .counts:before {display:block;background-color:#fff;color:#333;width:35px;height:35px;font-size:18px;line-height:35px;border-radius:2px;margin:0px 8px 0 0;}.counter-wrapper.text-counter-wrapper:before {content:&quot;\f06e&quot;;}.counts.post2:before {content:&quot;\f044&quot;;}.counts.comment:before {content:&quot;\f0e6&quot;;}#Stats1_content {width:auto;height:auto;background-color:#fff;}</style>
 Chú ý phần màu đỏ, nếu các bạn đã có thêm trên blog từ trước rồi thì có thể xoá bỏ nó khỏi blog. Chúc các bạn thành công!!


Nguồn Code Của Bạn  blog.huyhoangit

XEM CHI TIẾT
arrow_upward